Creating fonts from Public Domain reference
This is a continuation of the font creation theme, started with Creating fonts with Inkscape and FontForge post. If you haven't read it yet, I recommend doing so, as it contains the fundamentals of what we will do today.
Contents
Reference ↩
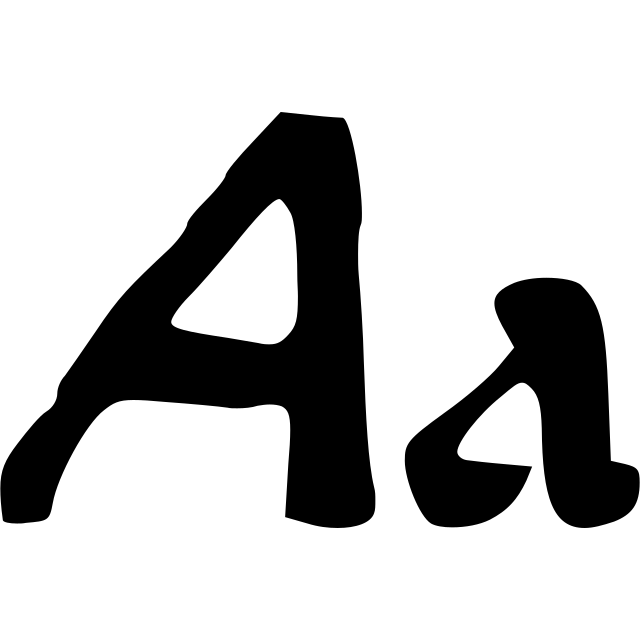
I have chosen to recreate style of Catholicon.1 The main reasons for this choice were:
- It has an interesting lettering style, not often encountered in computer fonts.
- Despite being quite old, the writing is still mostly recognizable.
- Being a dictionary, it surely will contain all letters in both lowercase and uppercase.
📝 NOTE: When working with ancient texts in Latin, you should be aware of scribal marks and abbreviations2,3 you could encounter, as well as various ligatures4, especially "long s"5 and "r rotunda"6.
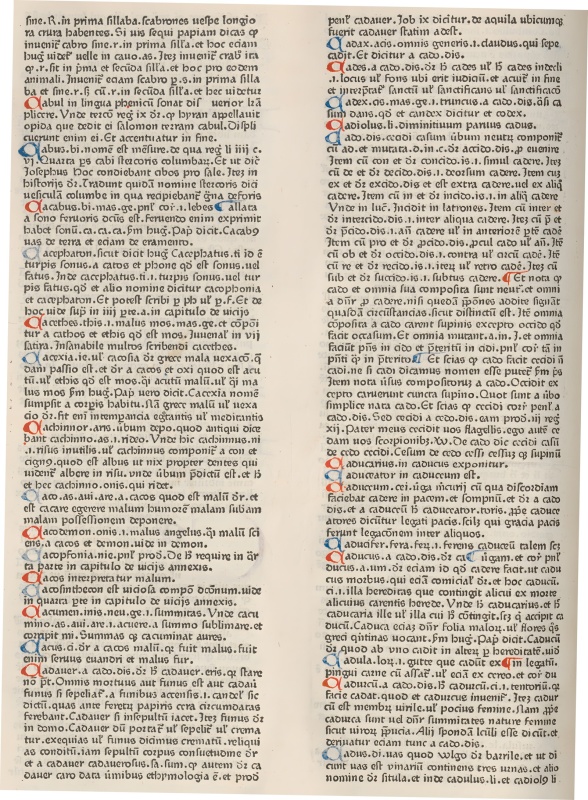
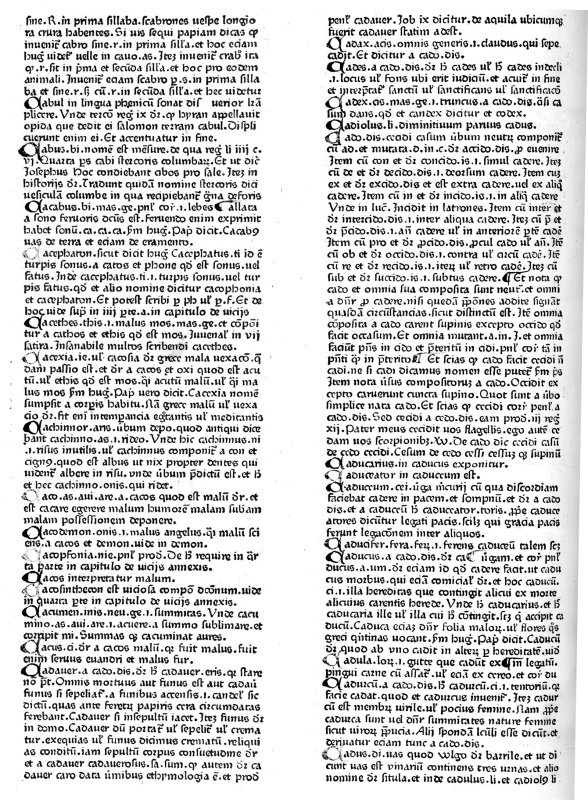
Just like with public domain art preparation7,8, I downloaded the best available scans of the book from the Internet Archive9. Upscaling might be required, if the scans are too small.
Krita ↩
The first step in the process, is to locate and extract all the required glyphs. In my case, it took about 30 pages.
Open the page in Krita10 and rotate it to make text lines horizontal.
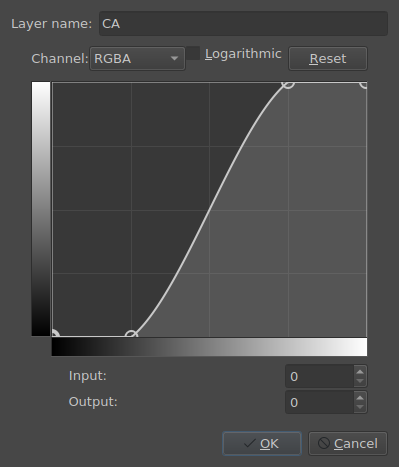
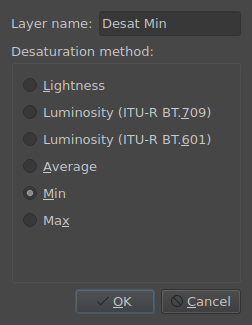
Now bring the image to grayscale, by adding Color Adjustment and Desaturation (Min or Max, depending on the text coloring) filters.
Then create a New Layer From Visible to work with.
Now we can start extracting glyphs into separate PNG images, using the list of Unicode chars11 as a checklist.
Since the book is in Latin, it will lack some letters (j, u, and w), as well as numerals and most of the punctuation we need. These will be created by combining and drawing over existing glyphs.
Inkscape ↩
Once the glyph collection is assembled, it is time to convert it to vector form to then edit in Inkscape12, just like in the previous post.
The obvious problem is, there are a whole lot of images to convert. Thankfully, the process can easily be automated with ImageMagick13 and Potrace14. Since I use Linux, I wrote a simple bash script15 to do all the work:
trace.sh
#!/bin/bash

function errCD () {
    echo "ERROR: \"$1\" is unreachable"
    exit 1
}

if [ $# -gt 0 ] # if there are arguments
then
    START="$PWD" # save the dir where the script starts from
    ARGN="$#" # total number of arguments
    DIRS=0 # arguments processed
    TOTAL=0 # files processed

    while [ $# -gt 0 ] # while there are unprocessed arguments left
    do
        if [ ! -d "$1" ] # if the dir does not exist
        then
            echo "ERROR: \"$1\" does not exists, skipping..."
            shift # shift to the next argument
            continue # go to the next while loop iteration
        fi
        cd "$1" || errCD "$1" # otherwise go to the dir
        echo "Processing \"$1\"..."


        mkdir -p svg # create the svg dir if not already present
        FILES=0

        for i in *.png
        do
            # convert to bmp and pipe to potrace
            convert "$i" BMP:- | potrace -s -o "svg/${i%.*}.svg" -
            ((FILES++)) # increment file counter
        done

        cd "$START" || errCD "$START" # go back to the starting dir
        ((DIRS++)) # increment argument counter
        ((TOTAL+=FILES)) # add file count to the total files counter

        echo "\"$1\" processed: $FILES files converted."

        shift # shift to the next argument
    done
else # if there are no arguments, print help
    echo "Usage: trace.sh dir1 [dir2...]"
    echo ""
    echo "Convert all PNG files in the selected directories into SVG."
    echo ""
    echo "Dependencies:"
    echo "- imagemagick"
    echo "- potrace"
    exit 0
fi

echo "--------"
echo "Finished."
echo "$DIRS/$ARGN directories processed, total of $TOTAL files converted."
exit 0
After converting all the glyphs to SVG, proceed to creating a font file in Inkscape's SVG Font Editor.
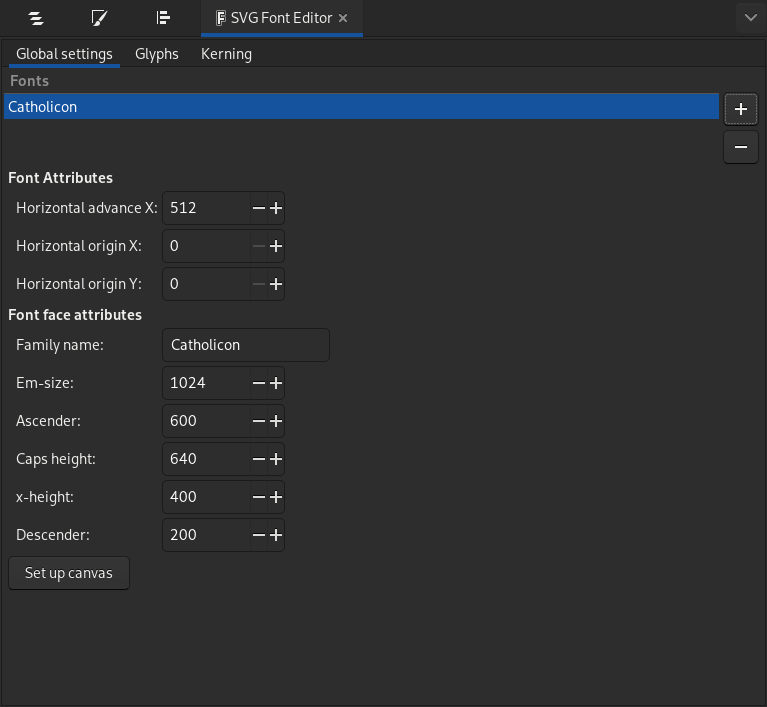
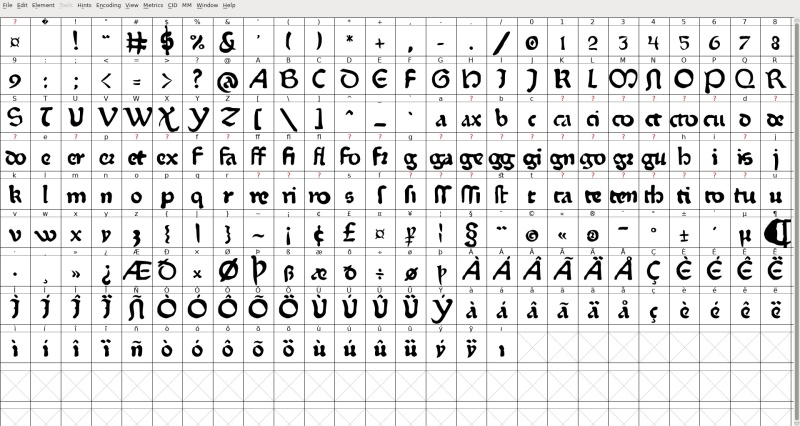
Starting with space (U+000020), populate the glyph list up to, but not including U+0000C0 (À) glyph. We won't bother with accents and diacritics for now. You can still create empty glyphs for these, if you plan to add them to your font.
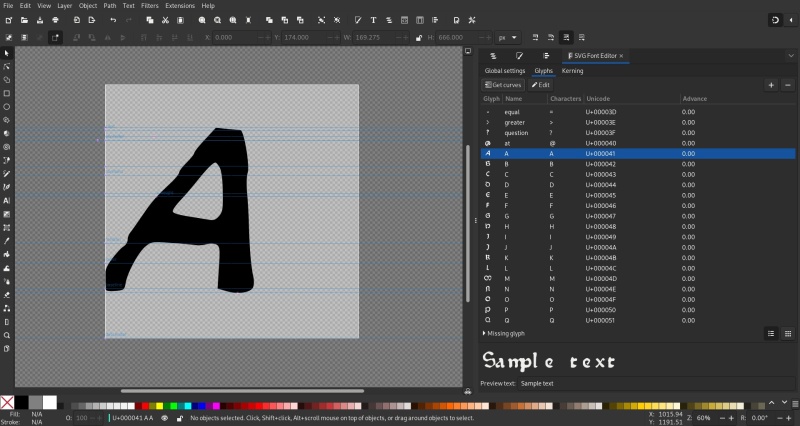
Don't bother with kerning either. It all can be done in a way easier way later. If you want though, you can put some non-English glyphs like þ, ß, æ, etc. I also created ligature glyphs for letter combos such as ff, fi, etc. If you name them accordingly, they will be automatically substituted in the FontForge-created font later.
FontForge ↩
Once the Inkscape SVG font file is ready, we will open it in FontForge16 — our final editor on the long path of font creation.
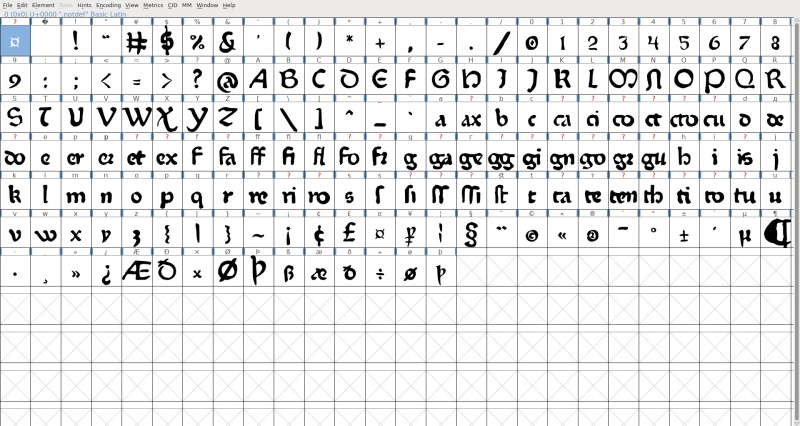
The steps are pretty much the same as were described in the previous post, so here I will list the order of their application:
- Edit
Element → Font Info… → PS Names Element → Transformation → Transform…(Ctrl+⧵) to adjust the vertical alignment (Y:-180).Metrics → Auto Width…(Ctrl+Shift+W) for the automatic letters separation (48,32-64).Metrics → Set Width…(Ctrl+Shift+L) for the specific glyphs, if needed (especiallyspace:256).- Go through your ligatures to see if any were auto-named incorrectly. They should all (except those already existing in Unicode) have the
Unicode Valueof-1and emptyUnicode Charvalue. Element → Font Info… → Lookupsand edit theligatable if needed, adding missing ligatures.Element → Validation → Validate…, fixing all issues.
Accents and Diacritics ↩
Now, the hard part. To do accented glyphs, like À and such, you first need to have empty slots for them in your font. If you haven't created them in the Inkscape stage, use Encoding → Add Encoding Slots… to do so. The quickest way to do this for a large number of slots, is to use Encoding → Create Named Glyphs… and load a text file with all needed glyphs' names. Here's the one I've used:
À Á Â Ã Ä Å Ç È É Ê Ë Ì Í Î Ï Ñ Ò Ó Ô Õ Ö Ù Ú Û Ü Ý à á â ã ä å ç è é ê ë ì í î ï ñ ò ó ô õ ö ù ú û ü ý ÿ
Then go through the newly added slots, copying the Glyph Name into Unicode Char for each.
Now, for each of the new empty glyphs, you can check what components it needs, by opening the Element → Glyph Info… → Components.
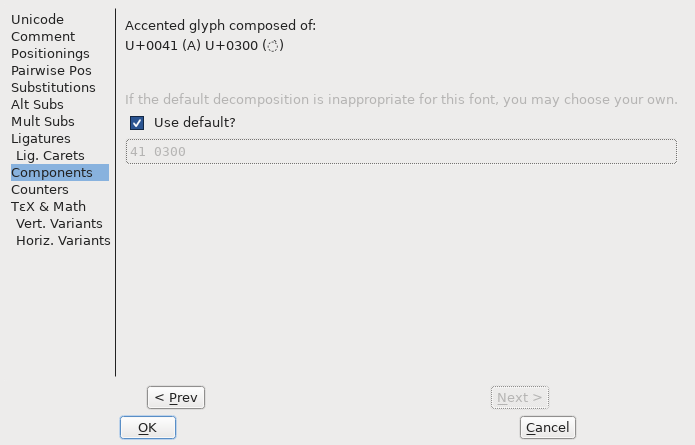
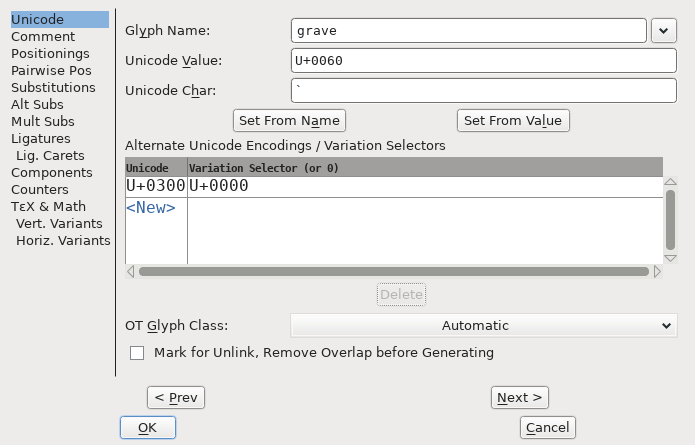
For example, here you can see that À (Agrave, U+00c0) glyph is created using A (U+0041) and ◌̀ (combining grave accent, U+0300) glyphs. We already have the separate grave accent glyph though (U+0060), and we can employ it to do double job for us. Open its Glyph Info… (Ctrl+I) and add an entry in the Alternate Unicode Encodings / Variation Selectors table, with U+0300 entry.
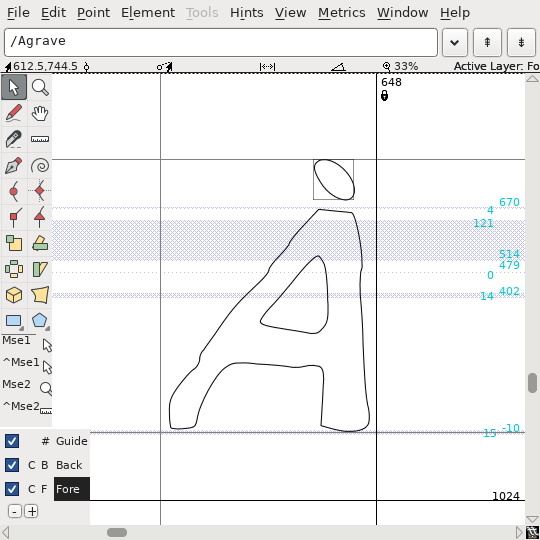
Now, selecting the À glyph, call Element → Build → Build Accented Glyph (Ctrl+Shift+A) and voilà! Your accented glyph is created, and you can make minor adjustments to it (mostly moving the accent in a better position) through the glyph editor (by double-clicking on the glyph). You can also do various transformations by selecting the accent object and calling Element → Transformations → Transform… (Ctrl+⧵), for example, to scale it down, if it is too big for the letter.
Here are the encodings for the accents I've used:
| base code | char | name | combining code |
|---|---|---|---|
| U+0060 | ` | grave accent | U+0300 |
| U+00b4 | ´ | acute accent | U+0301 |
| U+005e | ^ | circumflex accent | U+0302 |
| U+007e | ~ | tilde accent | U+0303 |
| U+00a8 | ¨ | diaeresis | U+0308 |
| U+00b0 | ° | ring above | U+030a |
| U+00b8 | ¸ | cedilla | U+0327 |
You will also need the dotless i (ı) for some of the glyphs, so prepare it beforehand by copying the i into the new slot and removing the dot by Edit → Chop.
Once it is done, and combining codes are assigned, you can just select all accented glyphs and press Ctrl+Shift+A to assemble it all automatically. Now you just need to adjust the glyphs as described above.
Afterwards, run the validation again to deal with the potential new issues. For example, some new glyphs (Å, Ç, ç) will be self-intersecting. To fix it, open the glyph editing window, do Edit → Unlink Reference, and then Element → Overlap → Remove Overlap (Ctrl+Shift+O) for each one of these.
📝 NOTE: For a more advanced overview of this topic, see Diacritics and Accents article.
After you are done with the glyph creation and want to delete empty slots or unneeded glyphs, select them, and call Encoding → Detach & Remove Glyphs, and then call Encoding → Remove Unused Slots.
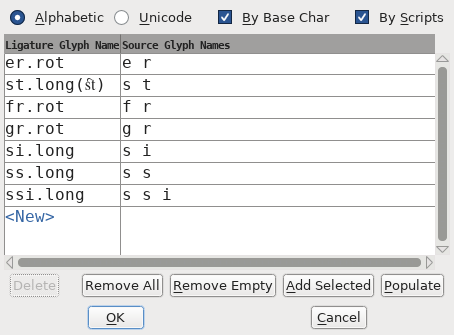
Historic Ligatures ↩
I have also decided to move ligatures containing "long s" and "r rotunda" into a separate lookup table hlig (Historic Ligatures), since these might confuse the user if enabled by default. Make sure to place it at the top of the GSUB list so it can override default liga (Standard Ligatures) lookup.
And… we are done! For sure, the further improvements and adjustments can be made, but this is a good starting point.
Download Catholicon font on itch.io
Discuss this post on Reddit

https://en.wikipedia.org/wiki/Scribal_abbreviation#Marks_with_independent_meaning↩
https://www.csmc.uni-hamburg.de/publications/mc/files/articles/mc07-gottfried-wegner-spano-lawo.pdf↩
https://vladar.bearblog.dev/public-domain-art-preparation-monochrome/↩
https://vladar.bearblog.dev/public-domain-art-preparation-in-color/↩
https://en.wikipedia.org/wiki/List_of_Unicode_characters#Latin_script↩