LaTeX images
One of the most essential functionalities for TTRPG layout, besides tables, is the rendering of graphic files. In this post, I will cover the most common operations related to this topic.
Just like the tables, images can be included into floats through figure environment. Since it was already covered previously, this topic won't be covered here.
Contents
Include graphics ↩
The graphicx package's1 \includegraphics command will be the main tool for you to load a graphic file into your document.
\includegraphics[options]{filename}
The options of the \includegraphics command can be classified into several categories:
- Scaling:
scale=1.0- scale ratiowidth=w- scale to the set widthheight=h- scale to the set heightkeepaspectratio- boolean key, keeps the proportions when scaling by bothwidthandheight
- Rotation:
angle=90- rotation angleorigin=c- rotation origin, may be one or two of the following (lBby default):B- baselineb- bottomc- centerl- leftr- rightt- top
totalheight=h- scale to the height plus depth, accounting for rotation
- Partial render:
viewport= a b c d- show the specified region of the graphictrim= a b c d- trim borders of the graphicclip- boolean key, clips the graphic to the bounding boxpage=n- select which page of a multi-page PDF file to render (1 by default)
- Original size of the source image:
pagebox=- specify which bounding box to use for PDF files; the possible values are:mediabox- physical medium borderscropbox- the region to which the contents are clipped when displayedbleedbox- the regions to which the contents are clipped in productiontrimbox- the intended dimensions of the finished pageartbox- the extent of the meaningful content
bb= a b c d- set bounding box as four space-separated numbersbbllx=a, bblly=b, bburx=c, bbury=d- four commands equivalent to thebb = a b c dcommand, specifying the coordinates separatelynatwidth=w, natheight=h- two commands equivalent to thebb = 0 0 w hcommandhiresbb- boolean key, makes LaTeX look for%%HiResBoundingBoxlines instead of%%BoundingBoxlines
- File parsing:
interpolate- boolean key, enables interpolation of raster imagesdraft- boolean key, displays an empty box of the correct size with the filename printed in itquiet- disable log outputtype- specify the graphics type; the following options works only with conjunction with this option:ext- specify the graphics extensionread- specify the file extension of the read filecommand- specify a command to be applied to the file
📝 NOTE: a b c d values represent the following coordinates:
a- lower-left xb- lower-left yc- upper-right xd- upper-right y
📝 NOTE: If units of length are not specified, bp (big point, 1/72 inch) unit is used.
There are a couple of other useful commands in this package:
\graphicspath{ {path1/} {path2/} }- specify a list of directories in which to search for graphic files\DeclareGraphicsExtension{ext1, ext2}- a comma-separated list of file extensions to append (in order) to the file name if no extension is specified\DeclareGraphicsRule{ext}{type}{read-file}{command}- specify LaTeX behaviour for the files with certain extension:ext- the file extension to which the rule applies;*applies to all undeclared extensionstype- the type of the fileread-file- the extension of the size information file;*specifies the sameextas the graphics filecommand- TeX code to modify the name of the file;#1denotes the original file name
Most of these options can be set globally, using \setkeys{Gin}{options} command. (Gin is a group of keyval keys for "Graphic inclusion".)
Examples
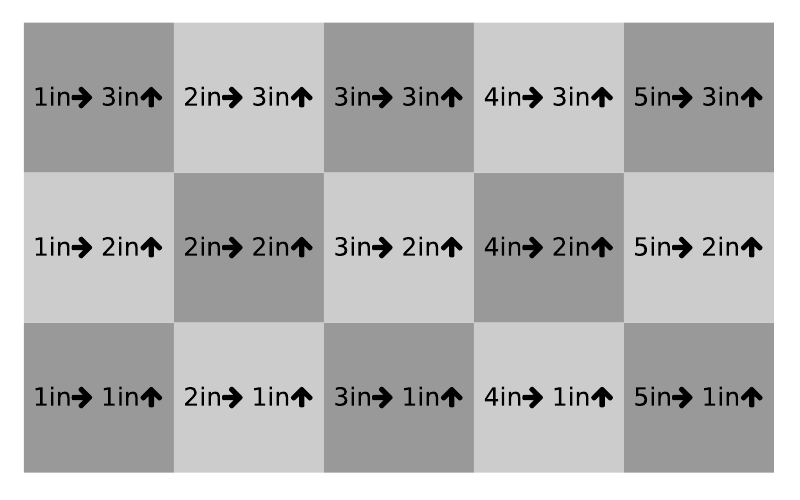
% Load image as-is
\includegraphics{image-test1.pdf}
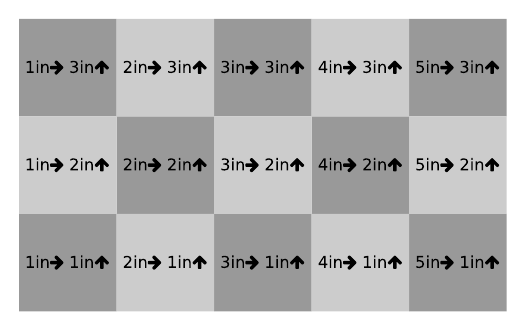
% Scale to 65%
\includegraphics[scale=0.65]{image-test1.pdf}
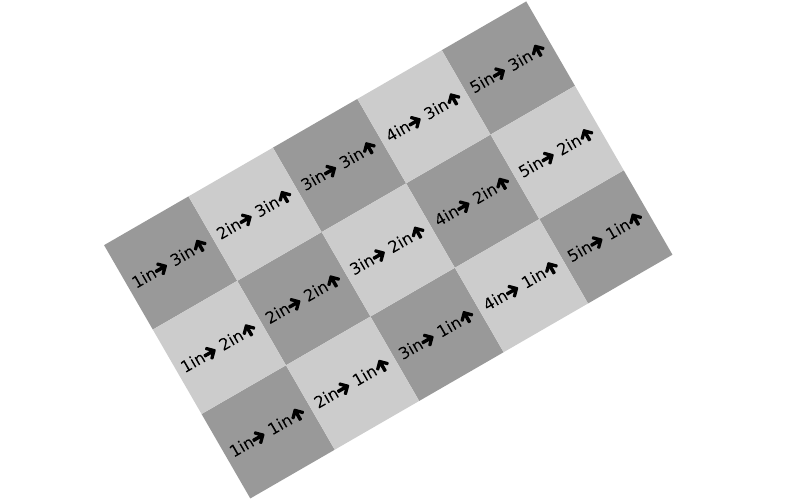
% Scale to 65% and rotate 30 degrees counterclockwise
\includegraphics[scale=0.65,angle=30]{image-test1.pdf}
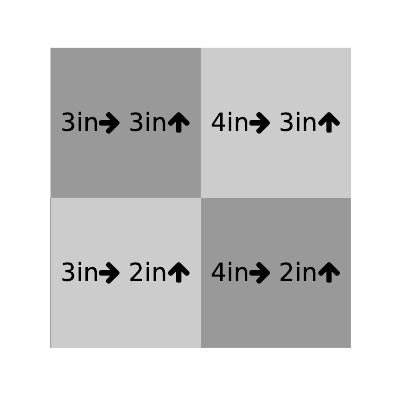
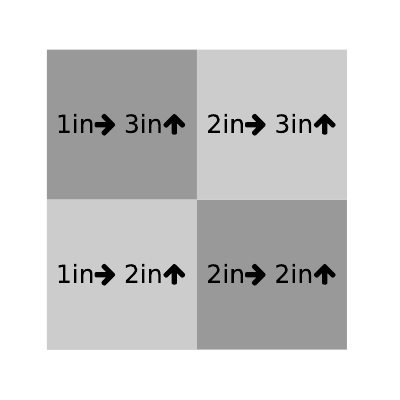
% Cropped region from 2in:1in to 4in:3in
\includegraphics[viewport= 2in 1in 4in 3in, clip]{image-test1.pdf}
% Trim 1in from the bottom and 3in from the right
\includegraphics[trim= 0in 1in 3in 0in, clip]{image-test1.pdf}
Text over image ↩
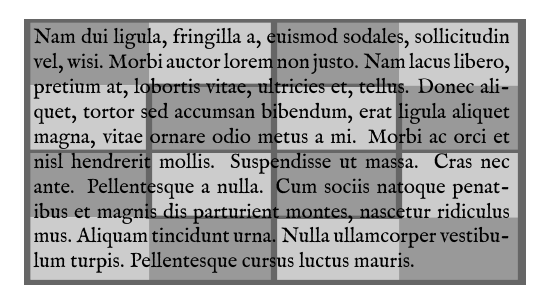
The graphicxbox package2 allows to add a background image
\graphicxbox[includegraphics options]{graphic}{content}
and add a colored frame around it
\fgraphicxbox[model]{color}[includegraphics options]{graphic}{content}.
\graphicxbox[width=\linewidth]{image-test2.pdf}{%
	\parbox{\linewidth}{\lipsum[2]}
}
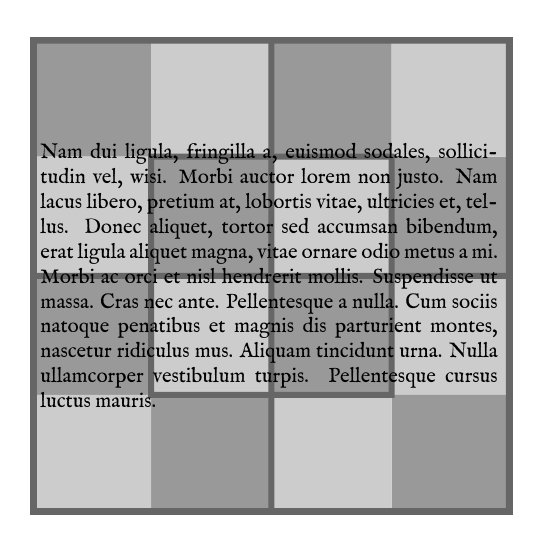
You can keep the image's aspect ratio by using the minipage environment and specifying the image's height and width manually (both with the -2\fboxsep adjustment)
\graphicxbox[width=\linewidth]{image-test2.pdf}{%
	\begin{minipage}
			[c]% vertical alignment
			[\linewidth-2\fboxsep]% height
			{\linewidth-2\fboxsep}% width
		\lipsum[2]
	\end{minipage}
Page color ↩
The pagecolor package3 allows you to set a custom page background color with the \pagecolor[model]{color} command, or reset it with the \nopagecolor command.
Page background ↩
Background package4
The background is configured through the \usepackage[options]{background} or \backgroundsetup{options} command, which options are:
pages=all(default) call the\NoBgThispageto disable the background on the particular pagesome- call the\BgThispagecommand on each page you want the background to be on
firstpage=- boolean key, (falseby default); iftrue, display the background only on the first page of the documentplacement=-center(default),top, orbottomposition of the background materialcontents=- the material to displaycolor=- the color of thecontents(red!45by default)angle=--360to360, the angle of thecontents(60forcenter, or0fortopandbottomby default)opacity=-0.0to1.0, the transparency level of thecontentsscale=- any positive value, the scaling factor of thecontents(15forcenter,8fortopandbottomby default)position=,nodeanchor=,anchor=,hshift=, andvshift=options allow to specify the exact position of thecontentsplacement (seepgfpackage5 documentation for the details)
\usepackage[pages=some,placement=top]{background}a

...

\backgroundsetup{%
	contents={\includegraphics{image-test1.pdf}},
	angle=30,
	opacity=0.5,
	scale=1,
	position=current page.north west,
	hshift=1in,
	vshift=-2in,
}

\BgThispage
Eso-pic package6
This package allows you to add images to background and foreground of the pages of PDF documents, using \AddToShipoutPictureBG and \AddToShipoutPictureFG commands. Starred versions will do this for the current page only. \ClearShipoutPictureBG and \ClearShipoutPictureFG commands clear the corresponding stack.
There is a collection of helper macros to specify the exact position of the image:
\AtPageUpperLeft{}\AtPageLowerLeft{}\AtPageCenter{}\AtTextUpperLeft{}\AtTextLowerLeft{}\AtTextCenter{}\AtStockUpperLeft{}\AtStockLowerLeft{}\AtStockCenter{}
For example, to display the image at the upper-left corner, you can do:
\AddToShipoutPictureBG*{%
	\AtPageUpperLeft{%
		\raisebox{-\height}{%
			\includegraphics{image-test1.pdf}
		}
	}
}

To stretch the image over the whole page, the following code could be used:
\AddToShipoutPictureBG*{%
	\AtPageLowerLeft{%
		\includegraphics[width=\paperwidth, height=\paperheight]{image-test1.pdf}
	}
}
Wallpaper package7
This is an extension above the eso-pic package, providing useful macros for aligning, scaling, and tiling:
\CenterWallPaper{scaling}{filename}- center of the page, scaling to fraction of page width or height, depending on the aspect ratio of the image\ULCornerWallPaper{scaling}{filename}- same, but upper left corner\LLCornerWallPaper{scaling}{filename}- same, but lower left corner\URCornerWallPaper{scaling}{filename}- same, but upper right corner\LRCornerWallPaper{scaling}{filename}- same, but lower right corner\TileWallPaper{width}{height}{filename}- tiled wallpaper, aspect ratio is not necessarily preserved\TileSquareWallPaper{num}{filename}- tiled wallpaper with 1:1 aspect ratio;numsets the number of tiles over the width of the page\ClearWallPaper- clear the wallpaper
\This* versions of these commands will do the same but only for the current page
Two lengths \wpXoffset and \wpYoffset may be set to tweak the position of the wallpaper on the page.
So, to make the image to stretch over the whole page, like in the eso-pic example, you will do the following:
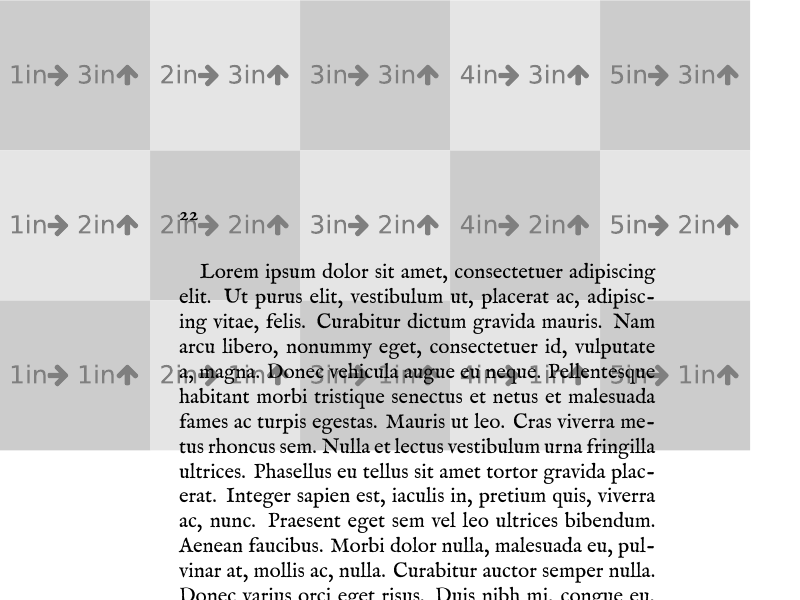
\ThisTileWallPaper{\paperwidth}{\paperheight}{image-test1.pdf}
Or, to tile the square image three times horizontally:
\ThisTileSquareWallPaper{3}{image-test2.pdf}
Reusing graphics ↩
If you plan to include the same image multiple times, the graphicxsp package8 should be used instead of the graphicx package to keep the PDF document size minimal.
📝 NOTE: This package requires that the PDF be created by Adobe Distiller, version 5.0 or greater for graphics without transparency, version 5.0 with transparency.
First, load the image using the \embedEPS[options]{name}{path} command:
optionscan take the following key-values:hiresbb- thegraphicxpackage key (see above)transparencyGroup- if the embedded graphic is to be used with transparency
name- the unique symbolic name for the graphicpath- the path to the graphic file
Alternatively, you can use the createImage environment to embed the Postscript code to draw the image.
Once the image is embedded, you can display it using the \includegraphics[name=myimagename, options]{path} command. If the name is specified, the path isn't used; otherwise, the command works as it does in the graphicx package. The second command to display the image, is \insertEPS[options]{name}.
📝 NOTE: Check the package's documentation for details on additional options, such as transparency parameters and Postscript commands insertion.
Discuss this post on Reddit