LaTeX: Gygax's military symbols collection
 |
Gary Gygax Day special |
The "Ancient and Medieval Standard Military Symbols" article1 by Gary Gygax from The Strategic Review Vol.II No.2 magazine introduced a collection of symbols to be used when depicting ancient or medieval troop formations, based on existing Napoleonic Era symbols.
The simplicity of these symbols makes them a great excuse to dive into the basics of TikZ drawing in LaTeX and, of course, making them available for future use in ancient and medieval wargames.
Contents
Basic concept ↩
We will use the wargame package,2 which was already covered in the previous posts of this series. A separate am-symbols.sty file will contain a single \tikzset command where the collection of symbols is defined in the natoapp6c/s/am/ namespace, making them available for use as chit symbols.
📝 NOTE: A more in-depth example is presented in the package's tutorial3 document.
\tikzset{%
	% 1 - LI
	natoapp6c/s/am/light-infantry/.pic={},
	% 2 - MI
	natoapp6c/s/am/medium-infantry/.pic={%
		\draw (-.5,.3) -- (.5,-.3) (-.5,-.3) -- (.5,.3);},
	% 3 - HI
	natoapp6c/s/am/heavy-infantry/.pic={%
		\draw (-.75,.5) -- (.75,-.5) (-.75,-.5) -- (.75,.5);},
}
Here you can see the basic TikZ \draw node for drawing lines: a pair of coordinates connected by --. In our case, they will be in the ±0.75 × ±0.5 range.
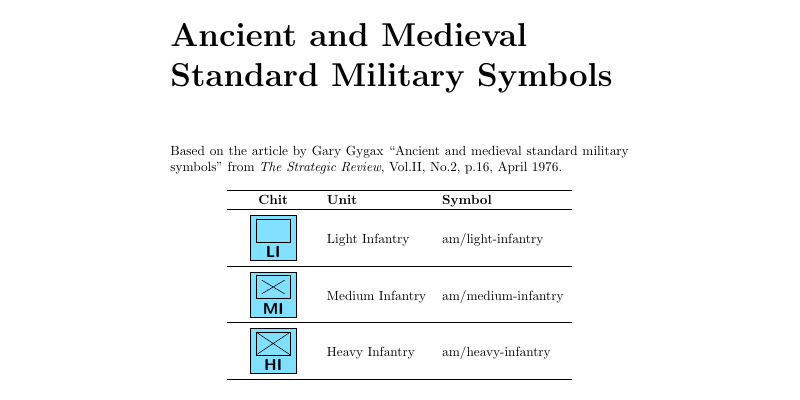
To test the output, create a simple document, importing the am-symbols alongside the other required packages. The \amsym command will be our shortcut for displaying the newly created pictures as wargame chits.
Since we want the default rectangular look for both friendly (blue) and hostile (red) symbols, we keep the faction=friendly unchanged in both cases. For those symbols that do not need the rectangle, we will pass none as the first optional argument.
The factors argument handles the text displayed below the symbol, and the main argument — the symbol itself.
\documentclass[10pt,onecolumn,oneside]{book}
\usepackage[utf8]{inputenc}
\usepackage{tabularx}
\usepackage{longtable}
\usepackage{tikz}
\usepackage{wargame}
\usepackage{am-symbols}

% 1 - command (land (default), none, etc.)
% 2 - symbol
% 3 - factor
% 4 - fill (friendly (default), hostile, etc.)
\NewDocumentCommand{\amsym}{ O{land} m m O{friendly} }{%
	\begin{tikzpicture}
		\chit[
		color=black,
		fill=#4,
		symbol={[
			command=#1,
			faction=friendly,
			main=am/#2,
			scale=1.5](0,0.1)},
		factors={chit/1 factor={#3}}];
	\end{tikzpicture}
}

\begin{document}

\chapter*{Ancient and Medieval Standard Military Symbols}

Based on the article by Gary Gygax ``Ancient and medieval standard military symbols'' from \emph{The Strategic Review}, Vol.II, No.2, p.16, April 1976.

\clearpage

\newcommand{\hhline}{\hline\noalign{\vskip 4pt}}

\begin{longtable}{>{\centering\arraybackslash}m{2cm}ll}
\hline\noalign{\vskip 2pt}
\textbf{Chit} & \textbf{Unit} & \textbf{Symbol} \\
\endhead
\hhline
\amsym{light-infantry}{LI} & Light Infantry & am/light-infantry \\
\hhline
\amsym{medium-infantry}{MI} & Medium Infantry & am/medium-infantry \\
\hhline
\amsym{heavy-infantry}{HI} & Heavy Infantry & am/heavy-infantry \\
\hhline
\end{longtable}
Further details ↩
Once the basic framework is in place, we can continue transferring the symbols through the TikZ code. Here I'll focus only on the most interesting examples. Skip to the end of the post to see the full source code.
Arrows ↩
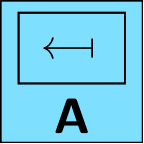
Adding arrow tips to lines is a simple matter of specifying them in square brackets after the \draw node, separated by a hyphen representing the arrow body.
% 8 - A
natoapp6c/s/am/archers/.pic={%
	\draw[<-|] (-.4,0) -- (.3,0);},
Shapes ↩
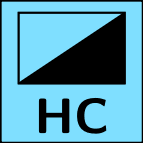
To close the shape, use the cycle keyword, drawing the line to the first coordinate.
The fill parameter will fill the shape with the given color. Use the pgfstrokecolor and pgffillcolor values for the default stroke and fill colors, respectively.
% 10 - HC
natoapp6c/s/am/heavy-cavalry/.pic={%
	\draw[fill=pgfstrokecolor] (-.75,-.5) -- (.75,.5) -- (.75,-.5) -- cycle;},
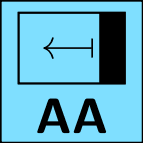
The default rectangle and circle shapes could be used as well.
% 7 - AA
natoapp6c/s/am/armored-archers/.pic={%
	\draw[<-|] (-.4,0) -- (.3,0);
	\draw[fill=pgfstrokecolor] (.4,.5) rectangle (0.75,-.5);},
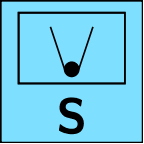
The parameter after the circle keyword is its radius.
% 13 - S
natoapp6c/s/am/slingers/.pic={%
	\draw[fill=pgfstrokecolor] (0,-.3) circle (.1);
	\draw (-.1,-.3) -- (-.3,.3);
	\draw (.1,-.3) -- (.3,.3);},
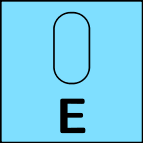
The rounded corners parameter (with an optional inset value specified like rounded corners=1pt) can be applied to any path or shape.
% 42 - E
natoapp6c/s/am/elephants/.pic={%
	\draw[rounded corners] (-.25,-.5) rectangle (.25,.5);},
Clipping ↩

Shapes drawn after the \clip node will only be visible if they overlap with its shape.
% 38 - SAA
natoapp6c/s/am/skirmishing-armored-archers/.pic={%
	\draw (0,0) circle [radius=.5];
	\clip (0,0) circle [radius=.5];
	\draw[fill=pgfstrokecolor] (-.5,0) rectangle (.5,-.5);},
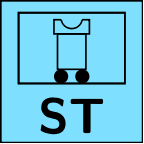
The siege-tower symbol is an example of more complex clipping paired with the scope environment used to produce a complex shape.
% 18 - ST
natoapp6c/s/am/siege-tower/.pic={%
	\begin{scope}[even odd rule]% cut out in the rectangle
		\clip (-1,-1) rectangle (1,1)
		(0,.425) circle (.15);
		\draw (-.25,.4) rectangle (.25,.2);
	\end{scope}
	\begin{scope}% clipped part of the circle
		\clip (-.25,.4) rectangle (.25,.2);
		\draw (0,.425) circle (.15);
	\end{scope}
	\draw (-.2,.2) rectangle (.2,-.3);
	\path[fill=pgfstrokecolor] (-.15,-.4) circle (.1);
	\path[fill=pgfstrokecolor] (.15,-.4) circle (.1);},
Bézier curves ↩
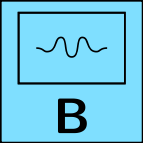
Drawing smooth bézier curves is also possible with .. controls (x1,y1) and (x2,y2) .. albeit somewhat tedious if you do not employ the assistance of some graphical editor to adjust the control points.
% 23 - B
natoapp6c/s/am/bore-pick/.pic={%
	\draw
		(-.5,0)
		.. controls (-.4,0) and (-.4,-.05) ..
		(-.35,-.05)
		.. controls (-.2,-.05) and (-.25,.15) ..
		(-.15,.15)
		.. controls (-.05,.15) and (-.125,-.125) ..
		(0,-.125)
		.. controls (.125,-.125) and (.05,.15) ..
		(.15,.15)
		.. controls (.25,.15) and (.2,-.05) ..
		(.35,-.05)
		.. controls (.4,-.05) and (.4,0) ..
		(.5,0);},
📝 NOTE: Naturally, this is merely scratching the surface. Consult the documentation4,5 for the detailed explanation.
SVG export ↩
Once all symbols are imported, we can also automatically export them to the SVG format by using the wgexport document class capabilities.
\documentclass{wgexport}
\usepackage{tikz}
\usepackage{wargame}
\usepackage{am-symbols}

...

\amsym{light-infantry}{LI}
...
\amsym{bore-pick}{B}

\end{document}
The produced PDF file will contain one chit per page, and thus can be easily converted to a series of SVG files with pdf2svg.
pdflatex am-symbols-export.tex
mkdir -p am-symbols
pdf2svg am-symbols-export.pdf am-symbols/am-%d.svg all
Source code ↩
Discuss this post on Reddit