Dungeon maps with Inkscape and Krita
This is a small collection of techniques for drawing dungeon maps in top-down and isometric styles using Inkscape1 and Krita2 — two popular free and open-source graphic editors.
📝 NOTE: This tutorial assumes basic knowledge of working with the mentioned software. If you are new to this, both editors have beginner tutorials and manuals linked on their home pages.3,4
Contents
Inkscape ↩
Rectangular grid ↩
Inkscape allows for the creation of rectangular and isometric (called axonometric here) grids to use as guidelines for drawing dungeons. Let's start with the rectangular grid, adding it from the File → Document Properties (Shift+Ctrl+D) dialog:

Note that Spacing is measured between minor grid lines.
Snapping ↩
Don't forget to enable snapping to the grid to make your job easier. There are also a bunch of other options for the snapping which you can enable or disable as you prefer:

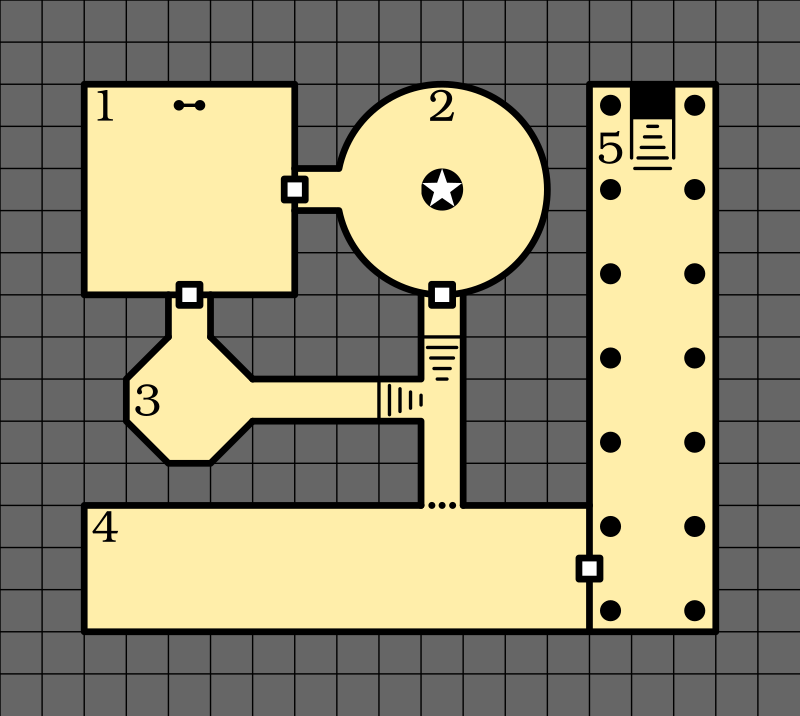
The map creation routine can be as simple or complex as you desire. Here I've used a combination of the following basic tools provided by Inkscape:
- Rectangle Tool (
R) - Ellipse/Arc Tool (
E) - Star/Polygon Tool (
*) - Pen Tool (
B) - Text Tool (
T)
You can change the order of the objects by using Object → Raise (Page Up), Object → Lower (Page Down), Object → Raise to Top (Home), and Lower to Bottom (End) commands while the object is selected.

Rendering rectangular grid ↩
As you can see, while the grid is visible in the editor, it isn't rendered to the final image. For this, you will need to draw the grid yourself. Thankfully, there is a default extension to help you with that: Extensions → Render → Grids → Grid…

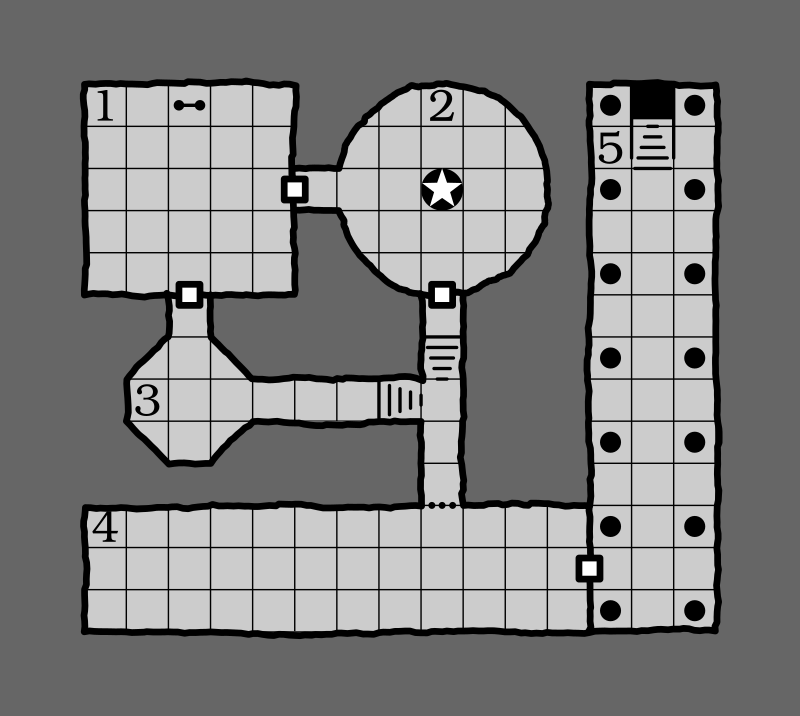
Once you click Apply, the grid will be added to your image. Don't forget to lower it enough so it won't show on top of your doors:

Not very pretty, as you can see. But we can remove the "outside" parts of the grid pretty easily by "clipping" it. First, you will need to create a shape in a form you want to keep visible. I've just duplicated (Ctrl+D) my "floor" light-grey object for this, bringing it to the top:
Now, select both objects (grid and clip mask) and do Object → Clip → Set Clip:

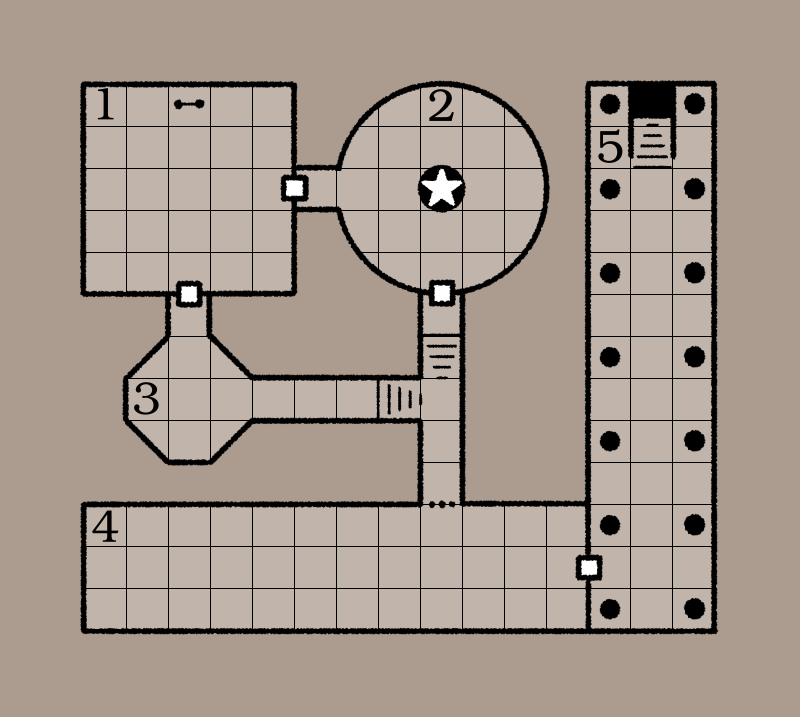
Rough lines ↩
For a more "hand-drawn" look (or if you want to draw natural caves, for example), you can apply a path effect to the "walls". First, while the wall is selected, open the "Path Effects" panel: Path → Path Effects… (Ctrl+&) and choose the Roughen effect from the drop-down effect list:

Modify the parameters until you are satisfied:

If the roughness gets out of hand in some places, just insert some nodes there to "anchor" the line to that point using the Node Tool (N).
Isometric grid ↩
Now, let's draw the same map in the isometric style. Just like the rectangular grid, we start with adding the axonometric grid through the File → Document Properties (Shift+Ctrl+D) dialog:

The same instruments can be used here to quickly produce a simple design:

Rendering isometric grid ↩
Rendering the isometric grid is somewhat trickier and is done through the Extensions → Render → Grids → Isometric Grid… dialog:

For some strange reason, you need to set the Division Spacing parameter slightly lower than your grid size. Use the Live preview to make sure the grid fits correctly.

We don't need the vertical lines, so hide them in the Layers and Objects panel:

If you see only the layers there, make sure that the Only show layers checkbox is disabled:


Just like before, let's clip the grid to the dungeon area…

…and we are done here:

Krita ↩
Rectangular grid ↩
In Krita, you can access the grid settings through the Grid and Guides docker: Settings → Dockers → Grid and Guides.

Drawing in Krita is pretty simple, so I will defer to the official tutorials4 if you need help with this. Here I've replicated the same map we did before:

Rectangular grid fill ↩
The easiest way to draw a grid is to create a custom pattern:

Once you add it to the pattern library with the Import Resource button (first icon under the search bar), you can use it as any other pattern:

On the second tab, adjust the scale until it fits your map:

Once you click OK, the whole page will be filled with the grid pattern:

Since I did the floor fill on a separate layer, I can easily duplicate it, change the color to white, and convert it to the transparency mask (Right Click → Convert → Convert to Transparency Mask) for the grid layer:

Check if the layers are in the correct order, and you are done!
Isometric grid ↩
The same Grid and Guides docker provides the isometric grid type:


Layer styles ↩
You can notice a white outline around the columns here. To do this quickly, right-click the layer with columns to open the Layer Style… and enable the Stroke checkbox, setting these parameters:

Isometric grid fill ↩
Just like with the rectangular map, we will use the custom pattern:


These parameters seem to be good for this pattern:

Still, you might need to stretch and move the grid fill to fit it better. You can easily do this through the Transform tool (Ctrl+T).

After this, the transparency mask can be employed in the same way as we did before, to hide the unneeded parts of the grid layer:

That's all for today. Have questions about other graphic topics? Let me know so I can cover them in the future!
Discuss this post on Reddit